It wasn't the weather for allotmenting today, so instead I spread newspaper over the dining table, reached for the paints and Gelli plate, and cracked on with yet more printing. I know, I'm obsessed with it right now. The sewing will resume soon, and progress will be made on all those quilts that're partly made and piled up waiting to be fully pieced, quilted, bound. But for the time being I'm going where my enthusiasm takes me.
I made a little more progress with the board book that I blogged about yesterday, and tried to take some better photos of it. But I can't quite capture the colours, they look faded in the photos, but maybe that's something to do with the metallic paint I used? Not sure, but I've never been great at taking pictures. Here are the blue pages at the start of the book. I've began adding details in the form of stenciled bubbles and stars, plus some scraps of tissue paper and wrapping paper.
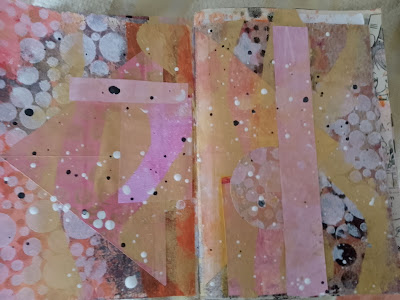
Please bear in mind, all of these pages are very much works in progress. Next up, the yellow themed pages.I've stenciled bubbles on these pages too. Can't seem to get enough bubbles! Okay, next up we have pink pages. Love love love the bold black acrylic. After pink, here's green, which I haven't worked on at all. Though I'm tempted to leave them as they are. Last up in the board book are the pages I added today. A mix of colours and stencils. I like the softness of these blue-ish greens and reddish pinks, as well as the contrasting shapes of the brickwork stencil and the bubbles stencil. Very pleasing. Putting the board book to one side, allowing the glue covered pages to dry, I turned to one of my handmade notebooks that I intend to be an art journal. The first of what could be many. The notebook contains various pieces of paper, including theatre flyers, copier paper, sketchpad paper, upcycled envelopes and even paper bags from shops. Here are the 'before' pages of my first attempt at art journal-ing. I wasn't sure how paint would adhere to that shiny blue surface of the flyer. It took a while and a few false starts before I got into the swing of it, and these were my transformed pages. All very random and not going to win any prizes, but I eventually came up with something I didn't entirely hate. Well, I couldn't expect my first attempt to be immaculate, could I? It's all a learning process and every day's a school day, as the saying goes. Anyway, I had another quick try and this happened. I think maybe I spent too long pondering over the pink pages, instead of speeding up and not over-thinking things, as I did with this blue page.Okay, to round up this rambling blog post, here's what I've gleaned about art journals from my recent browsing through YouTube:
1 - it can be daunting to start an art journal. Especially when you're chronically under-confident and are convinced everyone else knows the secret magic rules of art journal-ing, and you don't. But just dive in. Create and embellish pages that reflect your colour and pattern preferences. One tip is not to begin literally on page one of your new journal. Having to fill page one - the first page you or anyone else sees when opening your journal - can be paralysing. What if you make something that turns out to be hideous??? What if you fail so badly you can never pick up a paintbrush or glue-stick ever again??? Take a deep breath and turn to page two or three, or halfway through the journal if you'd rather. Always remember it's not the end of the world if you make an unholy mess. Which brings me to my second tip gleaned from online content.
2 - keep going. If you fill your journal page with paint or collage paper and it resembles nothing more than a heap of mud and dust, or reminds you of a bin fire, don't panic. Keep working on your page, and it's very likely you'll rescue it. Clear away the mud and dust. Put out the bin fire. I learnt this through watching several videos by Erin at eb_mixedmedia. She makes beautiful art journal pages, but lots of the time she struggles, unsure where that day's page is going, thinking she can't see a way through. But it all comes together in the end, and her journal pages gradually emerge like pretty butterflies. (Yours may not be butterlies, but keep going anyway. You'll get better if you practise.)
The third point is not something I've learnt from online content, but through my tentative first attempts to produce art journal pages. And that point is: it's really tricky to know when to stop. You make what you think looks good. Oh, but is it complete? Let's add a squiggle here, a gilded star there. Let's highlight that area with a Sharpie or dab some acrylic in this corner of the page. There's a point where you fiddle so much with your oh-so-nearly-right pages that you end up overdoing it and ruining them. Hold back. Mull things over. Brew a cuppa and take a breather. Don't be so anxious to conjure up something as skillful as that produced by 'proper artists' like that lot on Instagram. Do what you can, do your best and accept it won't be perfect. Above all, enjoy the process. Crafting shouldn't be stressful. It's fun. Don't forget it's fun!


Comments
Post a Comment