We've had a lot of drizzly, chilly days lately, which has been rubbish for getting the washing dry but good for staying in and getting on with crafty things. Mainly printing, it's got to be said. I joined Facebook a while ago, only to get access to useful posts on my slimming group's page. But I've since discovered a few craft groups that look interesting. I've just joined one for swapping ATCs - artist trading cards. Not that I consider myself an artist, but I like splashing around the acrylic and messing about with stencils and my Gelli Arts plate. So, I've been trying to make ATCs that're good enough to swap. The only rule is that they're 3 and a half inches x 2 and a half. I've cut rectangles from thin cardstock and tried to come up with ideas. I like these red and pink ones, but they need something extra. A focal point on each card, and I don't know what to include yet. Maybe some text?
The Facebook group has an artistic prompt for each month, and October's was Pop Art. I had a quick go at something pop arty, but didn't really make any decent headway with it. This was my only reasonably successful try. I'd bought an eraser to try carving into, to make a DIY printing stamp. This eye stamp was the result and I used black acrylic paint on tissue paper, which was then cut out and glued on to a collaged background. I was also messing about with printing pinks and purples on to card tags. I painted and stenciled and splattered and .... it just wasn't working out. They looked so dull. Lacking in that certain 'oomph!'. So I did what I usually do in these circumstances, and cut 'em up! I trimmed them to ATC size, and was happier with them. I still want to add something on each card though. Again, don't know what ...
Finally on the subject of ATCs, I made these which also have a kind of purple/pink colour scheme to them.
I'm happy with the scruffy, grunge kind of layers, the faint marks showing through, the odd splodges of bright colour among the washed-out shades.
Right, let's move on ... to more messing about with paint! (Honestly, I'm getting no sewing done at the moment. There're various patchwork bedspreads or throws that need quilting or binding, and I really ought to devote some time to them.)
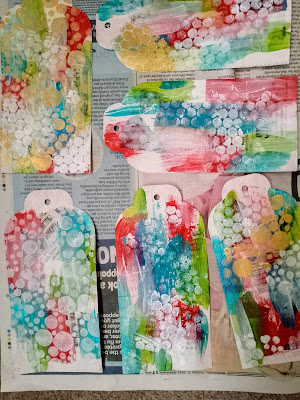
During my browsing through YouTube, I came across Birgit Koopsen, who produces fantastic prints. Online meandering took me to an old blog of hers. There were decorated tags on a blog posting, and I decided to make something similar. I die-cut half a dozen large tags in thin cardstock, then painted them white on one side. When that dried, I glued on small pieces of text torn from a newspaper. Over that I splodged random splashes of turquoise, green and red paint. It all looked very messy, but fingers crossed it'd come together in the end. I added more white paint in the form of a bubbles stencil, and flashes of gold acrylic too. The more layers went on the tags, the better they looked. I added more stenciling and reached a point where I decided they were done. They'll be glued back to back, and form part of a journal. I'll take a photo or two when that's assembled.Meanwhile, here's the cover of an earlier little book I made. I decided the other evening to add a couple of dangly bits to the front! For no other reason than I thought it'd be fun. There's a few lurex threads, a wee bit of punchinella and a little bit of collage. If you're still in the mood for more, here's a double page spread from a notebook I really liked. There's something very pleasing about all those circles. Okay, I'll finish the meandering post with my print that came from laying sage leaves on the gell plate. It's not entirely clear on this photo, but the veining on the leaves comes out really well. Okay, I'll stop here. Wander back tomorrow if you want more of my blathering on! Hope you have a good day. Bye!


Comments
Post a Comment