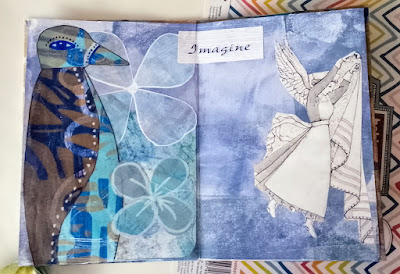
It's the first Wednesday of a new month, so I'm traipsing into Leeds today for a StitchArt class. Don't know what the theme will be for this session, but I'll blog about it tomorrow. Probably. For now, here's a quick round-up of crafty things that might - maybe possibly? - be of interest to you. First off, I've shown this before but in case you've not seen it. It's my version of a fodder keeper. An expression I learnt from YouTube where lots of papercrafters were showing books they'd made to keep paper flowers & small cutouts, etc in. The books had stitched plastic pockets inside to slip things into.Rather than make a new book, I decided this was an ideal use for a photo album that was brand new but never previously used. I stuck a gell print on the cover to prettify it, and it's been re-stuffed with lots of flowers I've been recently making. Plenty of these unused albums turn up on charity shop bric-a-brac shelves, so you should easily pick one up for a fraction of its original retail price. Next subject, homemade washi tape. I've been meaning to have a go at this for ages. You can use masking tape, but this method uses microporous tape. Meant for sports injuries, and bought from somewhere like Boots or Superdrug. You peel off lengths of the tape and stick it on to a sheet of plastic. Then it's simply a case of applying paint to the surface. You can stencil and stamp to your heart's content. I'm not entirely sure about the colours, but the method works well, and the tape can be easily peeled off the backing and used on a journal page or to seal an envelope. I'll try making this again, but next time I fancy blues and silver, maybe a watery stencil design too. Another thing I tried using with the gell plate was this tracing paper. I'd watched a YouTube video by Suziqmakes where she suggested using this as an alternative to the usual copier paper. It takes the colour really well. I'd bought this pack of 50 sheets of tracing paper, but there's no way I'll ever need that many sheets to trace the odd design or pattern with. So it makes sense to use some of it for another purpose. Talk of gell printing brings us on to this odd trio. I decided the other day I'd take part in GelliArts September challenge, where you do something arty in response to a prompt. So far the prompts have been A for animals, B for birds, C for cards and D for denim. I've kinda had a go at the birds prompt, but am behind on the others. I made these Megan Quinlan style birds, drawing a basic template then cutting out birds using that as a guide. They're painted with watercolour pencils, have gell prints collaged on and a few dots drawn on with Sharpies. I added this bird to a journal page, along with some paper flowers and an image cut from a magazine, along with the word 'Imagine'. The plum coloured bird in a party hat ended up in what was once a baby's board book. Purely by chance I found the phrase 'very dandy plum' in a heap of paper scraps. It's all a bit mad, I know! But apparently there's no right or wrong to collaging or art journaling. You do whatever takes your fancy, and in the end it all helps teach you about colour and composition. Well, that's the theory.
I'm off to fetch a bureau in the next half hour or so. It's something I found on Facebook marketplace, for the princely sum of a tenner. My brother's giving me a lift, and fingers crossed the furniture will fit in the car. Might be a tight squeeze! Wish us luck.


Comments
Post a Comment