
Making progress with my Textile Art Journal

On Saturday it was back once again to a ridiculously busy Leeds city centre - can't abide it when it's busy! too much noise, too many people - and to the Art Gallery for the second of four classes on making a fabric covered book.  (We'd the option of making a fabric cover and paper signatures inside, but I've opted for a wholly textile book.)  With this second session people had more idea of what their individual journal might look like, and it was great to see how many different interpretations we had.  
Some were working on their embroidered covers, but I opted to concentrate on making my pages.  I've four double pages in total, slightly different sizes & mainly made of upcycled upholstery swatches.  I began adding extra smaller pages, like this lovely cream coloured material, and more pockets.  There's only so much you can sew in a two hour session, so I carried on over the weekend.  
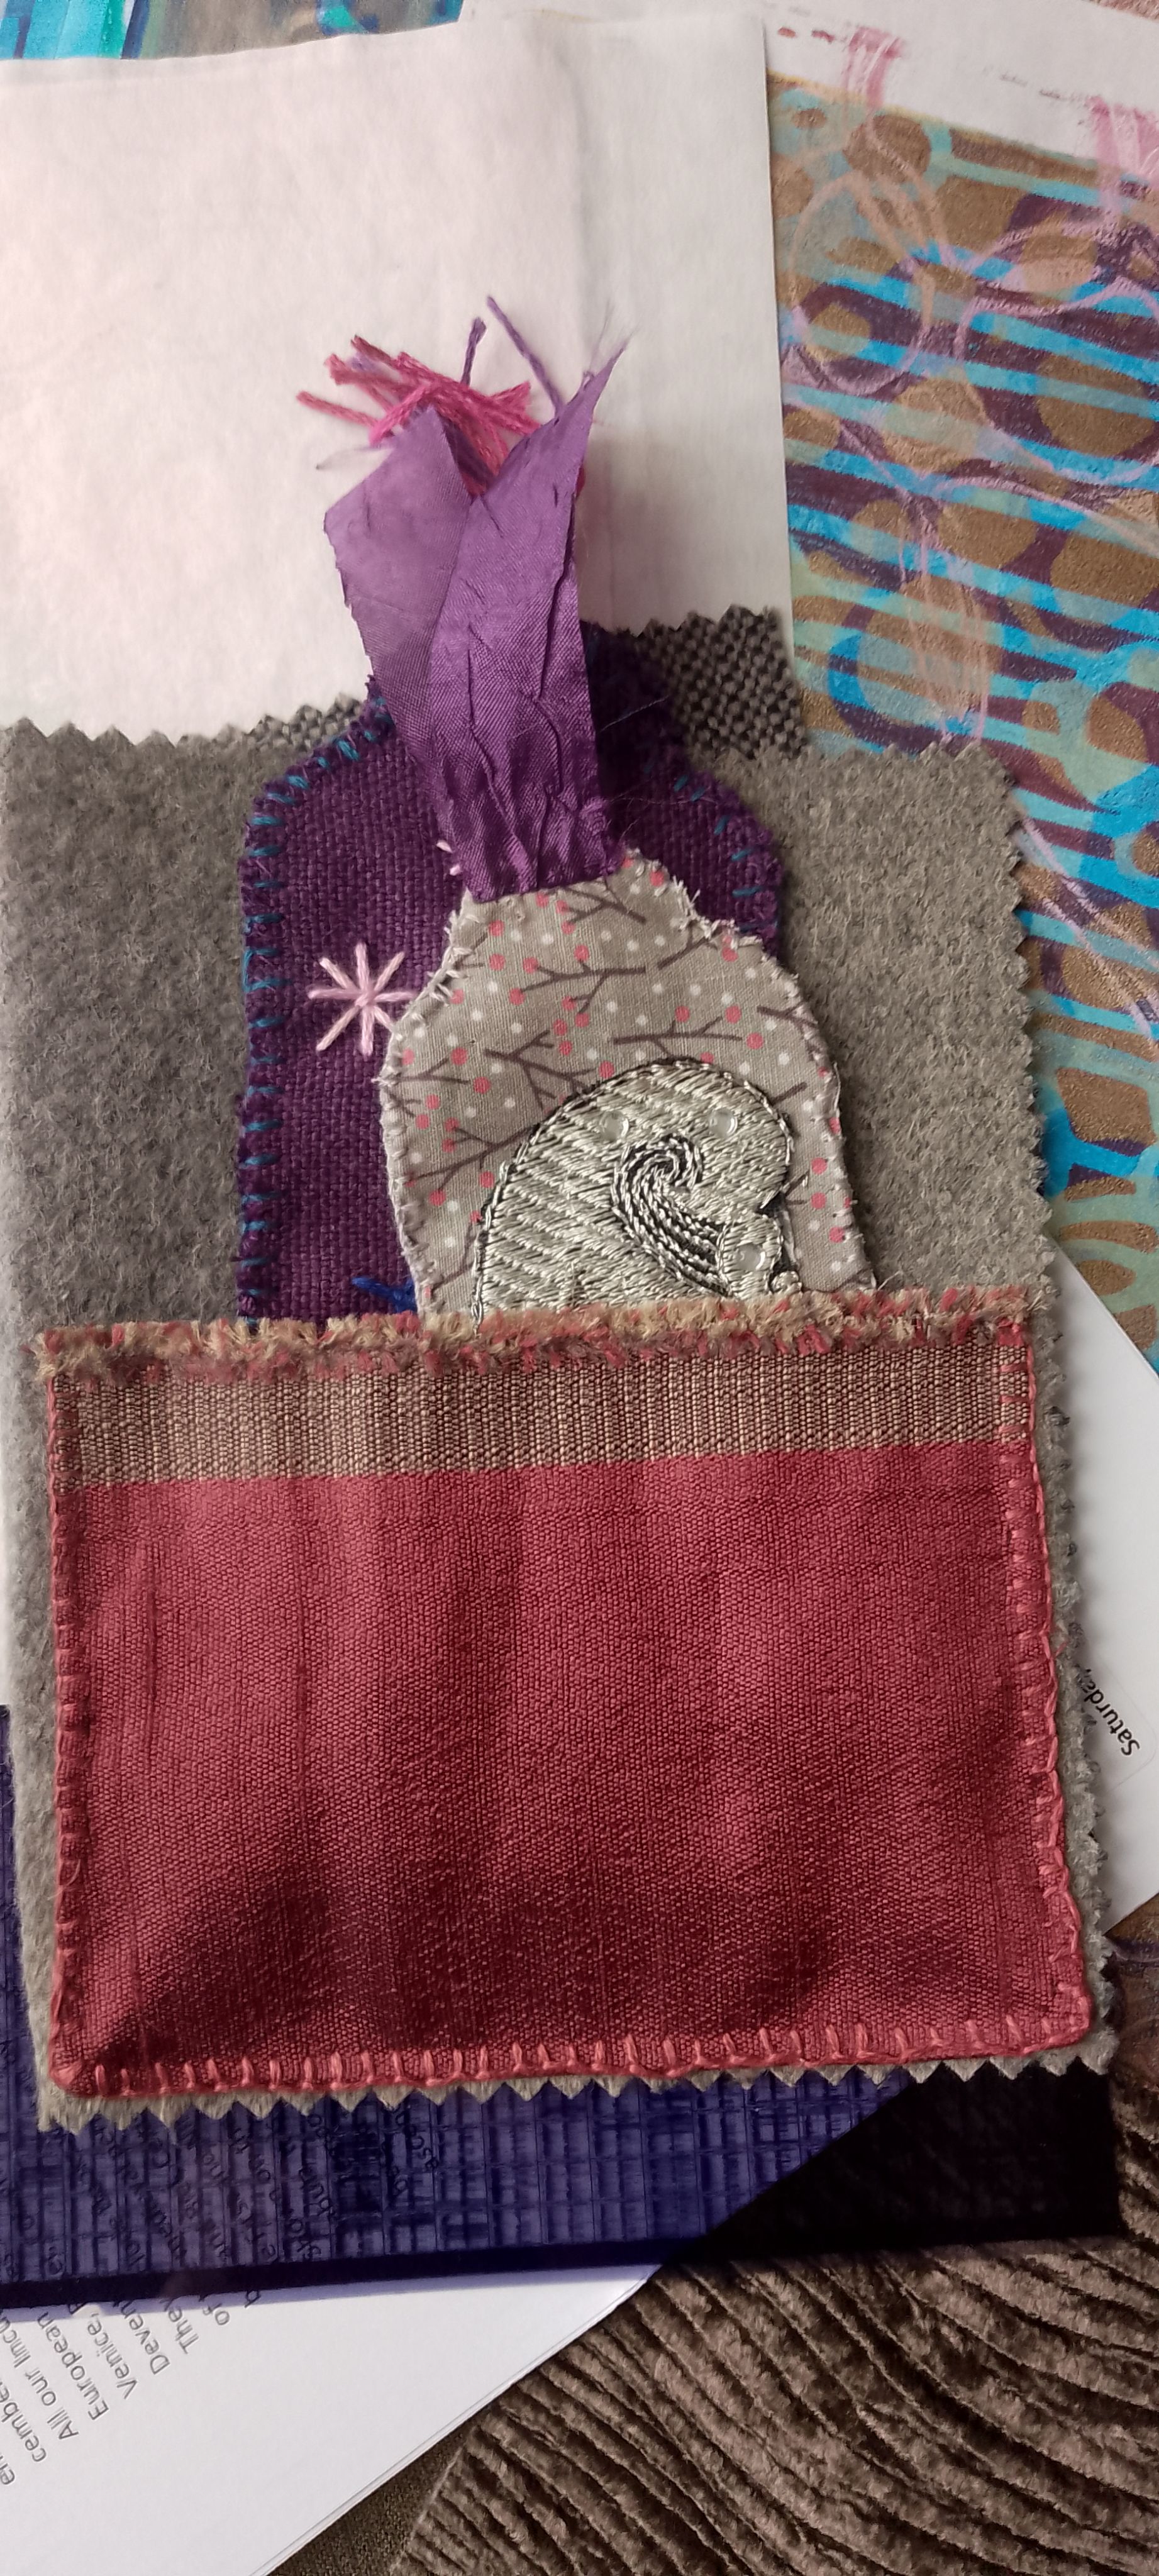
This material was originally curtain fabric from the look of it, and I used it to make a pocket, particularly liking the selvedge which is emphasized by using it at the opening.  
I used another cream coloured swatch to make a double pocket, machine sewing it on to the page.  (By the way, their sewing machines are Berninas, and it's the first time I've used a Bernina.  Oh my giddy aunt!  I want one!  It's like the Rolls Royce of sewing machines, a real contrast to my basic workaday Brother.  If I ever win the lottery - unlikely as I never play it - I'd shell out £1,500 for one of those beauties.)  
I later added one of my homemade boho style beads to the double pocket.
This cream insert has a piece of braid added over it.  I used the back of the braid as I liked that as much as the front. I sewed this braid at the top and base of the page, so it acts like a band.  
Here's the front of the braid on another page, where it forms yet another pocket.  
Finally, I've started embroidering the front cover.  So far, there's fly stitch, seed stitch, lazy daisies and running stitch.  My library of stitches isn't that extensive, but I'm learning gradually and am pretty pleased with the cover so far.  

Hope you enjoyed that glimpse of how my book's being created, and I'll be back in a week or so's time with the third class and how I've got on.  Bye for now.  


Comments

Popular posts from this blog

HOW TO MAKE: these decorative birds

 I suggested yesterday that I'd run through how to make a fabric bird wall or window hanging (can't think of a snappier title for it than that!) so here goes.  I'll start with the first decorative hanging I made.   It's something you could make in any colour combination you want, and would look good hanging at a window with translucent beads that'd catch the light   I used five birds for this, but you could make it longer if you prefer.  (Incidentally, if you're wondering about what's hanging off the bottom on this, it's a metal Christmas decoration, shaped like a lantern.  For some reason I thought it looked appropriate to leave it there, looped over the end.)   WHAT YOU'LL NEED TO GATHER TOGETHER:  Assorted scraps of fabric for the front of the birds - aim for a mix of colours and textures.  Silk looks good, as does anything with embroidery or intricate patterns.  You might aim for a hippy-ish boho look, or maybe you're more the minimal Scandi

Sari scraps, PVA, a couple of books and a necklace

  I'm typing this as snow's falling, and has been steadily all day.  It's not settling to any great extent, though I bet by tomorrow morning the paths will be slippery with ice.  Which always makes me paranoid about falling over and at the very least looking undignified, but at worst breaking a bone or twisting an ankle.  Oh well, it's ideal weather to stay inside and craft, isn't it?  I finally got around to listing packs of sari scraps on Etsy this morning.  I only made up six bundles as I've no clue whether they'll sell or if I've set a reasonable enough price point.  Time will tell.   This is a link to the listing, if you're interested.  This vaguely pink fabric isn't from one of my Etsy packs.  It's from a bit of experimenting I was doing yesterday.  I'd seen a post on Instagram showing how a DIY version of batik could be done without using hot wax.  The Instagrammer used PVA instead, and I wanted to try this out.  The glue's su

Paper flowers, leaves, feathers ...

  I had a few requests after posting this photo on Facebook, people asking if I could explain how I made these paper flowers. Your wish is my command, and here's the info.  It's all very simple and you don't need any advanced drawing skills.  So grab a stack of gell prints, a pair of scissors and off we go!  The type of print that seems to work best is one where there's a fair amount of detail, rather than a block of solid plain colour.  Prints where you've maybe channelled your inner Elizabeth St. Hilaire and 'layered layered layered' as she's always urging us to do.  POPPIES If we start with simple poppy seed heads and stalks, they're cut freehand from paper that's mainly shades of orange and brown.  I glued those on to a sheet of white copier paper, then cut them out, leaving a narrow border around each.  Backing the gell print with the white paper adds that contrasting border, but also strengthens the piece, especially the thin stalks.   I