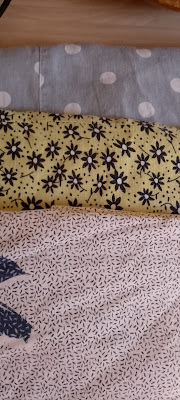
Thursday already, and this week's charging ahead. It feels like the year's quickening, as if it can't wait to roll into November, December and see in the New Year. The nights are definitely drawing in, with the overhead lights going on at 7.00pm, if not a little before. I miss those long light evenings even more than I miss summer's warmth. I spent an hour on the allotment today, tidying up and trying to get the plot ready for its period of hibernation. I collected a handful of leaves while I was down there as I want to experiment with using the gell plate and printing with them tomorrow. This idea was set in motion by Wednesday's Stitch Art group that I attended. The theme was around environmental art, with particular ref to Andy Goldsworthy, the two images above being examples of his work. For our little taster session we spent part of the time printing on to calico using leaves and various colours of Speedball printing ink. The results have a faded quality, but you still get details of the leaf shapes and veins. Once we'd experimented with printing we got on with our stitching. Pre-prepared calico squares with leaves already printed on them, and lots of embroidery thread to embellish them with. I chose this piece of calico as I liked the way the leaf shapes weren't sharply defined, but had a blurry quality to them. It reminded me of when autumn leaves are trodden into the pavement, and they become almost like shadows of the original leaves. So near to disintegrating entirely and going back to Nature. The blue colour of the printed leaves didn't remind me of autumn so much as winter. Sharp frosty days. I embroidered the calico using a combination of back stitch and seed stitch, and carried on at home with fly stitches and satin stitch. Plus I added tiny seed beads in clear glass and light blue, and touches of metallic silver thread. For next month's class we're trying our hand at machine-embroidering portraits! Should be fun! Totally changing topic, while I was in Leeds I nipped into Asda and snagged myself an air fryer. I've been thinking about getting one for ages, and this was a steal at only twenty quid. It'll be interesting to try cooking meals in it, instead of using a conventional oven, and I expect it'll take a few trial & errors to get things right. On the subject of buying things, I found some decent charity shop buys in the last few days. These three dresses were a quid each, and all will be cut up and added to my fabric stash. There's also this beautiful Monsoon lined skirt, a snip at £1.49. If only I wore skirts instead of living in jeans or leggings ... but as I do, then it's destined for patchwork fabric too. There's a biography of Agatha Christie to add to my towering To-Be-Read pile, as well as this box set of 'The Crown'. I don't have Netflix or any of the subscription channels, so series like this have passed me by. Luckily I still have a DVD player. Sometimes it's worth hanging on to the old technology, isn't it? Especially as that box set cost me a mere 50 pence.I know this blog post is veering all over the place, but just before I go, can I mention this book by Chloe Wilson. 'The Mindful Magic of Flower Drawing'. If - like me - you want to improve your basic drawing skills (and mine are very basic!) this book's a good option. The author takes you through how to draw different leaf shapes and flowers, and it's all nicely laid out and simple to follow. I reckon some of these shapes will be making appearances in my embroidery too. Okay, that's all my meandering ramblings for now. Feel free to leave a comment and let me know what crafty things you're up to this autumn.
It's Saturday afternoon, and I haven't done half the things I'd meant to. Partly because I spent most of this morning messing about with paints, stencils and the gell plate. Never mind, everything on today's 'To Do' list will join tomorrow's 'To Do' list ... it's hardly life or death if I don't haul the hoover around the room or pull up weeds in the front garden. I thought I'd show you what I made on Wednesday. I'd gone to my monthly StitchArt group, and this time we did something a little different. There's a project called 'Threads of Freedom' which is working with various community groups across the city. It's about creating little stitched pieces, some of which will be included in a textile panel to go on display at Leeds art gallery. There was lots of fabric we could choose from to sew with, and I picked this vintage tray cloth with the roses embroidery. My own embroidery's not a patch on those flo...


Comments
Post a Comment