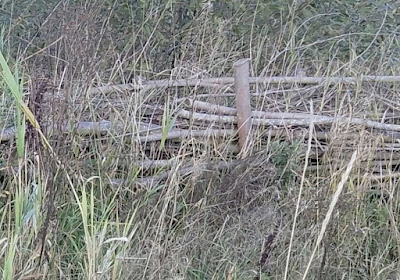
It's going to be an indoors kind of day for most of this Sunday. Grey sky and rain. Lots of rain. So I'll start this blog post with a few photos from a couple of walks this week, when it was blue sky and astonishingly mild for mid-October. There's something very restful about being outside and looking at a view where you can see open fields and a wide slice of sky, with no buildings to block your gaze. You can escape the hemmed-in feeling that town or city life can give you. It's the same as being at the seaside. It's not just the smell of salt air and the sound of the waves and the crunch of shingle underfoot that we love. It's that uninterrupted view to the horizon. Thoughts don't seem to crowd in as much when there's distance ahead. Anyway, on to craftier matters. I've been taking pictures of the hedgerows in all their autumn colours and various stages of decay in the run-up to winter. I want to make stitched pieces based on the countryside I see, and need to start with trying to sketch them. Even though my drawing skills are poor. I can imagine capturing these shapes and shades in thread much more than I can in pencils or paint.I like the mix of fresh greens with the washed-out dried leaves, side by side. This woven fence could definitely be represented in embroidery thread or crewel wool, maybe even a nubbly textured knitting wool. The bleached almost to white dried leaves with those flashes of muted green at the top. That slow stitch project is very much at the mulling-it-over stage where nothing much is happening, besides me pondering about it. In the meantime, I did begin this tiny bit of slow stitching, just because I had a small rectangle of white cotton with a printed stamp on it. I used stem stitch on the stem - logical, huh? - and the rest's in simple running stitch. Maybe satin stitch for the leaves. Not decided yet. I would've finished it today, but the light's not good enough in my sitting room for this kind of work. So instead I'll probably crack on with my embroidered bag. The patchwork is all sewn in place, just the final sections of embroidery to complete, then I can add the lining and construct the simple bag shape. What else can I tell you? Oh yes, I've been continuing with Lorna Scobie's '365 days of Creativity'. If you remember, I wasn't entirely happy with the 'view of a doorway' page I completed. Well, it kept niggling away at me, so I covered over the page with a blank sheet of paper and tried again. I painted a scene from nature - sky, trees, random plants, grassy meadow - still wasn't happy, so I stenciled over the whole thing with metallic gold paint! It looks a mess, but weirdly I'm okay with that. The opposite page was a simpler affair, drawing patterns on snakes. Then an exercise in appreciating the usefulness of the colour wheel. Enjoyed that. This was daft! You just had to scribble. I closed my eyes and this happened. This is one book I'd better not close my eyes and scribble on! Recently finished Anna Freeman's first novel 'The Fair Fight'. It's set in late 18th century England, and centres on a small group of characters all connected one way or another with pugilism. Ruth is a fighter herself, born in a brothel and hoping to escape that fate through using her fists. Apparently, watching women fighting in a boxing ring was an actual thing back in those days, which came as a surprise to me. It's an interesting read, has a plot that moves along at a fair pace and I enjoyed it, with a couple of reservations that I won't trouble you with. I've started on 'Lessons in Chemistry' by Bonnie Garmus, which is great fun, though the misogyny it's heroine Elizabeth Zott faces in her working life is unbelievably infuriating to a modern reader. I think this book'll be a quick read, and she's a character I'm really warming to and want the best for.
Right, that's all for now. Can't think what else to tell you. I hope your weekend's going well.


Comments
Post a Comment